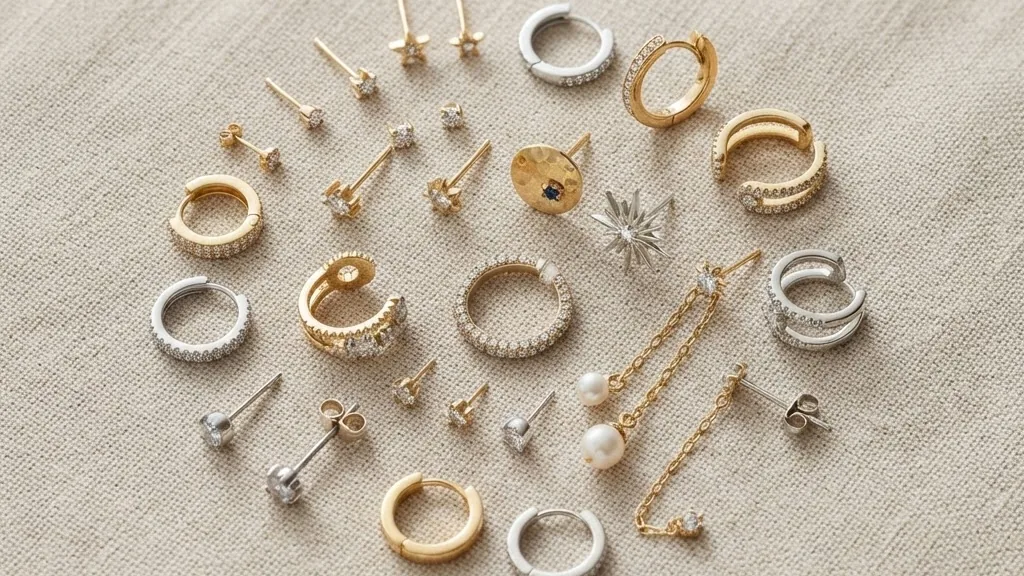
Multiple ear piercings work best when the medical facts and the styling ambition sit on the same page, because the ear that looks incredible in three months is the one that healed cleanly in the first three weeks. Most guides pick a side: the clinics explain healing but skip the curated-ear intent, and the style blogs stack helix, tragus, and second lobe without a single infection number. This guide keeps both. You will get named placements, sourced healing ranges from WebMD and the Cleveland Clinic, the complication data from The Laryngoscope, the material standards the Association of Professional Piercers actually mandates, and a straight answer on how many holes one session can take before you are trading looks for scar tissue.
The stakes are real. Cartilage heals slowly, guns should never touch it, and “surgical steel” is not a defined standard. Getting those three things right separates a healed ear from a year of angry bumps. None of this is exotic knowledge. It is a short list of rules that a licensed piercer already follows, and this guide simply puts that list in front of you before you sit in the chair rather than after something has gone wrong.
Quick answer: Multiple ear piercings are safe when spaced sensibly and fitted with implant-grade jewelry. Piercers commonly place 2 to 3 on one ear in a single session, and many cap it near 2 to limit trauma, doing one ear at a time so you can sleep on the other. Earlobes heal in 6 to 8 weeks; cartilage takes roughly 6 to 12 months. Up to about 35 percent of people with pierced ears report at least one complication, so needle placement, a licensed piercer, and ASTM F136 titanium matter more than the metal’s price tag.
Every ear piercing placement, named and mapped
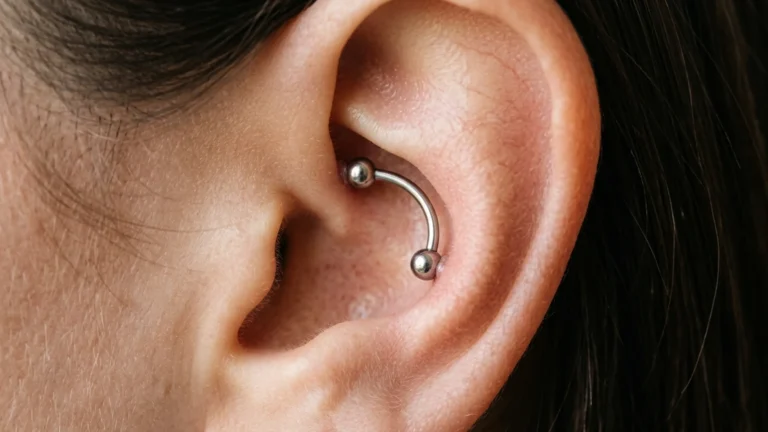
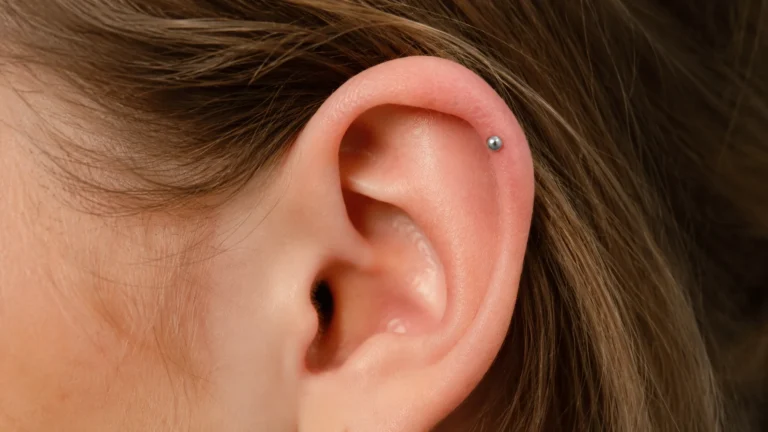
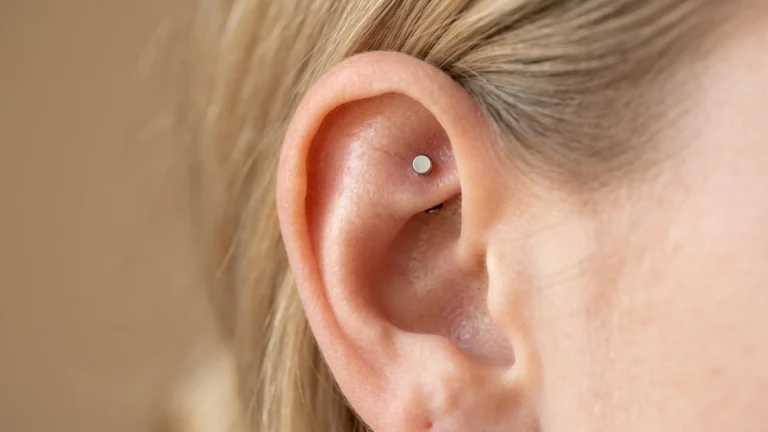
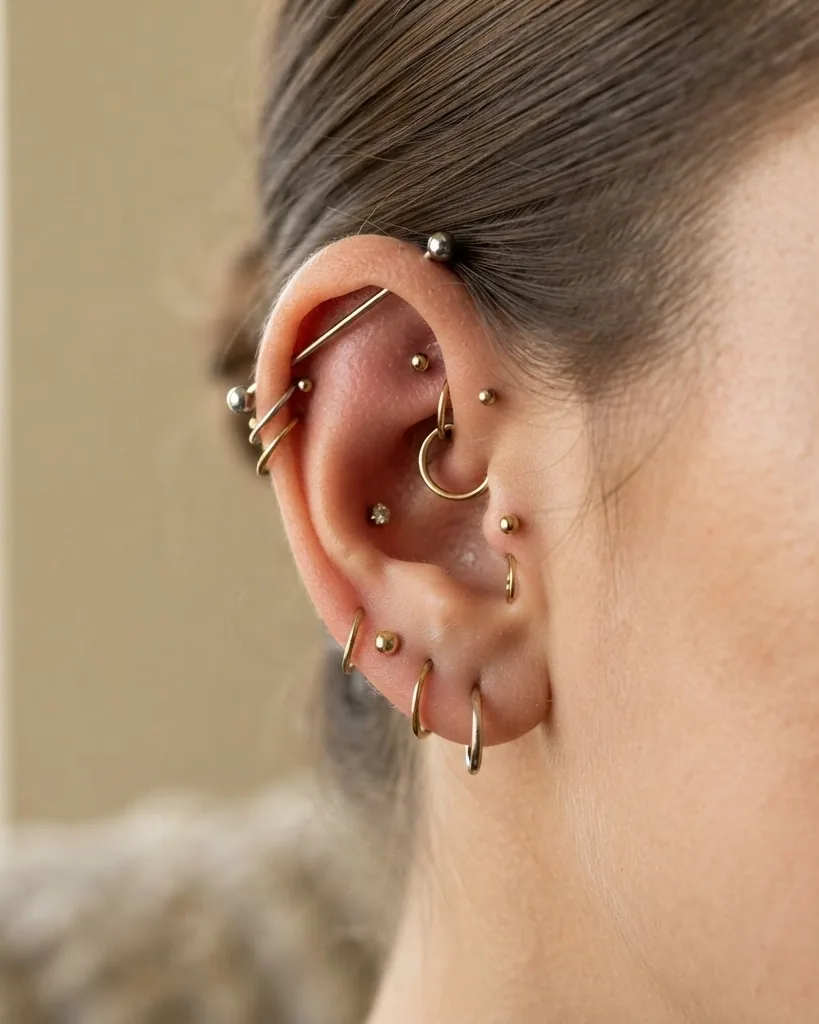
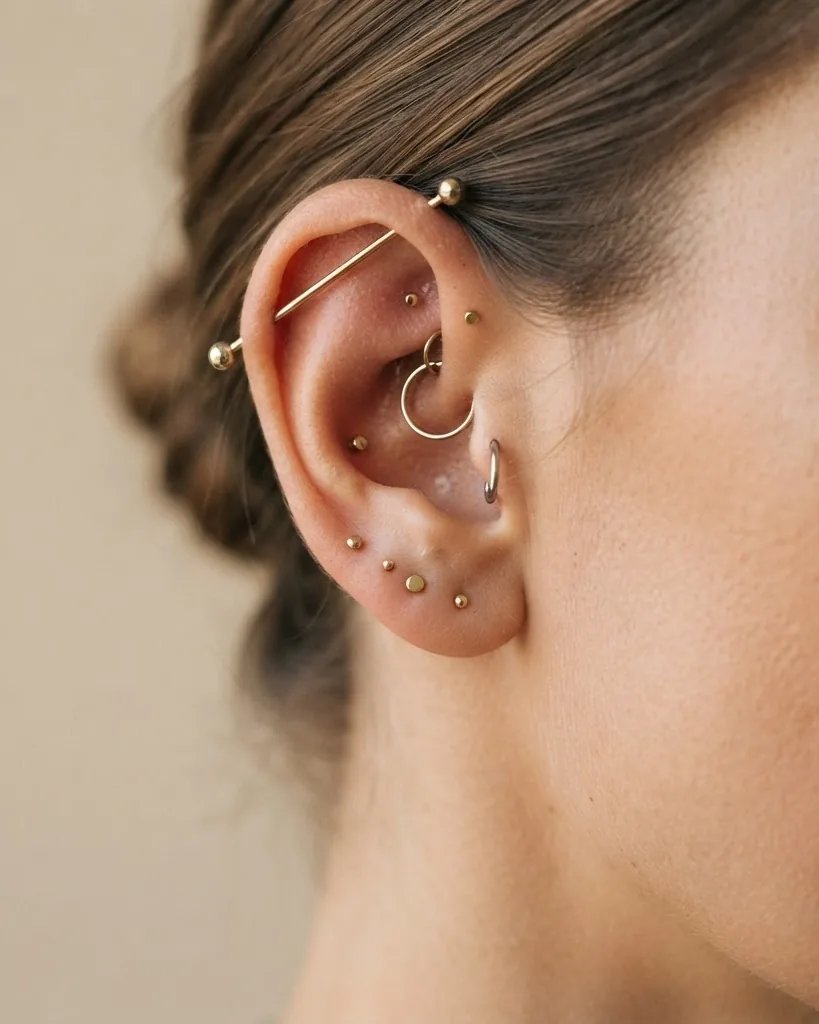
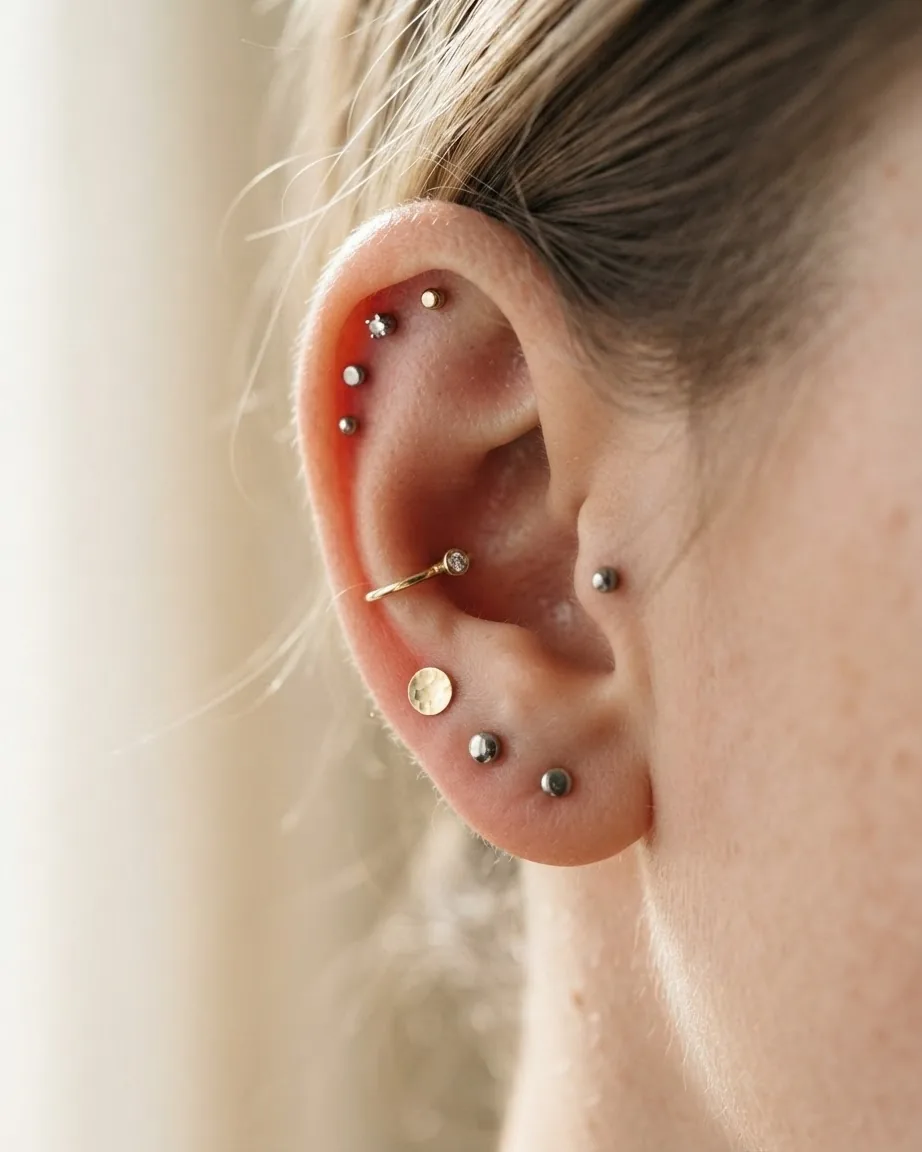
A curated ear is built from named placements that fall into two families: soft lobe tissue and firmer cartilage. Lobe options include the standard lobe, the second and third lobe stacked upward, and upper-lobe positions. Outer cartilage covers the helix, forward helix, flat, and the industrial, which links two helix holes with one barbell. Inner cartilage is where anatomy gets picky: the tragus, anti-tragus, rook, daith, conch (inner and outer), snug, and orbital. Not every ear fits every placement. A rook or daith needs a specific ridge or fold, and a good piercer assesses your anatomy before promising a spot.
Placement choice drives everything downstream: pain, healing time, and which jewelry seats correctly. Lobe positions are the forgiving entry point. Inner-cartilage spots reward patience.
The lobe family is worth separating further because it is not a single spot but a small ladder. A standard lobe piercing sits in the fleshiest part of the ear and tolerates almost any jewelry shape, from a stud to a medium hoop. A second lobe piercing sits slightly above it and works best once the first has fully settled, since the two channels share the same tissue and can pull on each other if placed too close. A third lobe or an upper-lobe piercing pushes toward the cartilage border, and at that point healing behaves a little more like an outer-cartilage piercing than a classic lobe.
Outer cartilage rewards a similar staged approach. The helix runs along the outer rim and is usually the first cartilage piercing people add, since it is easy to reach, forgiving of jewelry angle, and simple to clean. The forward helix sits closer to the face, just above the tragus, and is more anatomy-dependent because that part of the rim is thinner on some ears than others. A flat piercing goes through the flat cartilage plane above the ear canal rather than through a rim, which changes both the pain profile and the healing angle. The industrial links two helix piercings with a single straight barbell, and it is the placement most likely to migrate or reject if the two holes are not spaced correctly by an experienced piercer.
Inner cartilage is where the anatomy check matters most. A tragus piercing goes through the small flap in front of the ear canal, and its thickness varies enough between people that jewelry length has to be measured individually. The rook sits in the fold above the daith, and some ears simply do not have enough of a ridge there to hold a piercing securely. The daith runs through the innermost fold and is often chosen for its central, symmetrical look, though its channel is one of the more technically demanding to place cleanly. The conch, whether inner or outer, offers the most open space on the ear and suits larger decorative jewelry once healed. The snug and the orbital are the least forgiving of the group, since both depend on cartilage shape that not every ear has.
If you are mapping out a first build, a plain reference to the named spots helps. Our breakdown of the types of ear piercings and their placements shows each position on the ear, and the deeper dive on the triple helix cartilage piercing placement and care is worth reading before you commit to a row of three along the upper rim, since that cluster tests healing more than any single hole.
- Lobe family: standard, second, third, upper lobe.
- Outer cartilage: helix, forward helix, flat, industrial.
- Inner cartilage: tragus, anti-tragus, rook, daith, conch, snug, orbital.
How many ear piercings you can safely get in one session
Practitioner guidance converges on a narrow range: 2 to 3 piercings on a single ear at once is generally considered safe, and many experienced piercers cap it near 2 at a time to limit tissue trauma. A common piece of advice is to pierce one ear at a time so you can sleep on the untouched side, which spares the fresh work from pressure while it settles. Treat these as sensible practitioner conventions rather than a hard clinical threshold. The real limiter is not a magic number but total trauma, blood supply to the site, and how much aftercare you can realistically sustain across several wounds at once.
Order matters as much as count. Build a curated ear in stages: start with lobe or outer-cartilage placements that heal faster, then add inner-cartilage spots once earlier work has stabilized.
Think about the session limit in terms of total wound load rather than a fixed count. Two lobe piercings and one helix piercing in a single sitting is a lighter total load than two cartilage piercings alone, because lobe tissue has better blood flow and recovers faster even when a second hole is added nearby. A piercer who understands this will often mix a fast-healing lobe addition with a single cartilage piercing rather than clustering three cartilage holes together, since three cartilage wounds compete for the same limited blood supply and slow each other’s recovery.
Spacing sessions also spreads out the swelling and the sleep disruption, which is why studios rarely encourage a full ear in one sitting. If you are budgeting pain across a plan, the ear piercing pain chart by placement lets you sequence the tender spots deliberately rather than stacking three sharp ones on the same afternoon.
A practical spacing rule many piercers suggest is waiting at least 6 to 8 weeks between cartilage sessions on the same ear, matching the earlobe healing window even though cartilage itself takes longer. That gap gives swelling time to fully resolve and lets you confirm the first piercing is tracking normally before adding trauma nearby. If a first cartilage piercing is still tender, red, or weeping past that window, that is a signal to pause the build-out rather than push ahead on schedule.
A sensible build-out order
- Stage one: standard and second lobe, which heal in 6 to 8 weeks.
- Stage two: outer cartilage such as helix or flat, once lobes calm.
- Stage three: inner cartilage like rook, daith, or conch.
Needle versus gun, and choosing the right piercer
Piercing guns have no place on cartilage, and the reason is mechanical. A gun forces a blunt stud through tissue by pressure, which shears and crushes cartilage rather than cutting a clean channel, raising the risk of fracture and tissue death. A hollow needle removes a core of tissue and leaves a cleaner wound that seats jewelry properly. Guns are also difficult to sterilize fully because many contain plastic parts that cannot survive an autoclave. For a curated ear built largely from cartilage placements, the needle-only rule is non-negotiable, and it is the first thing a licensed studio will tell you.
The person holding the needle matters just as much as the tool. Look for a piercer registered with the Association of Professional Piercers, which sets both aftercare standards and acceptable initial-jewelry materials.
A studio visit should follow a predictable pattern. Expect a consultation first, where the piercer checks your ear for the anatomy needed for the placements you want, discusses jewelry options, and confirms you understand aftercare before any needle comes out. Single-use sterile needles should be opened in front of you, and jewelry should arrive in sealed, labeled packaging showing the material grade. A piercer who marks the spot with a surgical pen and asks you to confirm placement in a mirror before piercing is following standard practice, not being overly cautious.
Ask to see jewelry documentation, confirm single-use sterile needles, and expect an anatomy check before any marking. A studio that rushes past consent, refuses to show mill certificates, or reaches for a gun near your helix is telling you to leave.
Price is a poor proxy for quality in this industry. A cheap piercing that skips consultation or reuses a gun on cartilage is not a bargain, since the cost of treating perichondritis or removing a rejected piercing far exceeds what a proper session would have charged. If a studio cannot answer a direct question about jewelry standards or sterilization method without hesitation, that hesitation is itself useful information.
Healing timelines by site, and why cartilage lags
Healing time is set by blood supply, and the ear has two very different zones. Earlobe piercings reach initial healing in 6 to 8 weeks according to WebMD, the Cleveland Clinic, and figures cited by the Association of Professional Piercers, though full tissue healing can take up to about 6 months even when the surface looks fine. Cartilage is slower because it is largely avascular, with low blood flow feeding the repair. WebMD and other patient references put cartilage healing at roughly 6 to 12 months, with outer cartilage often closing in 3 to 6 months and inner cartilage taking 6 to 12 months. The gap is biology, not bad luck.
The trap is the “looks healed but is not healed” window. Piercings heal in layers from the outside in, so a calm surface can hide a channel that will still react if you swap jewelry too early or sleep on it hard.
A rough week-by-week picture helps set expectations. In the first week, mild swelling, tenderness, and clear or slightly whitish fluid are normal for both lobe and cartilage piercings. By weeks two to four, a lobe piercing usually feels settled while a cartilage piercing may still throb after contact or sleeping on it. Around week six to eight, lobe piercings are typically ready for a jewelry change, while cartilage piercings are often only at the midpoint of their healing arc. Full cartilage healing, where the internal channel has fully closed around the jewelry rather than just the visible surface, can extend well past the 6 to 12 month range in slower healers.
Several factors slow the clock further. Diabetes, smoking, and steroid use impair wound repair, and constant irritation from sleeping on the piercing, snagging it on a pillowcase, or pressing a phone against it keeps a fresh cartilage hole inflamed for months.
Age and immune status also play a role that is easy to overlook. Younger, generally healthy piercees tend to heal faster and with fewer setbacks, while anyone managing a chronic condition or taking immunosuppressive medication should expect the longer end of every range and should mention their health history to the piercer before booking, since it can change which placements are advisable at all.
What lengthens healing
- Systemic factors: diabetes, smoking, and steroid medications.
- Mechanical irritation: sleeping on the site, phone pressure, pillowcase snags.
- Early interference: twisting jewelry or downsizing before the channel is ready.
Aftercare that actually holds across several piercings
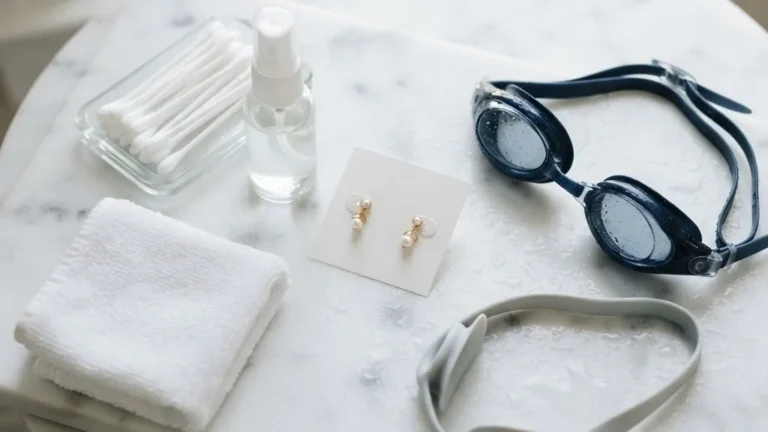
Aftercare for multiple piercings is the same simple protocol repeated with discipline, and the core is sterile saline. Clean each piercing once or twice a day with a saline solution made for wound care, and skip the harsh stuff. The Association of Professional Piercers and mainstream medical references agree that alcohol and hydrogen peroxide damage healing tissue and should stay away from the wound, and the American Academy of Dermatology likewise steers people toward gentle cleaning and leaving jewelry in place for six weeks or more. Do not twist the jewelry, do not overclean, and pat dry with clean gauze rather than a cotton ball that sheds fibers into the channel.
Sleep and hygiene do the quiet work. Keep the piercing off the pillow, wash pillowcases often, wipe your phone screen, and stay out of pools and hot tubs while the wound is open.
When you have several piercings healing at once, batching the routine helps you stay consistent. Clean all of them in the same short session each morning and evening rather than treating each one separately throughout the day, since over-handling multiple fresh wounds tends to introduce more irritation than it prevents. Keep a small dedicated saline bottle and a stack of clean gauze in one spot so the routine takes under two minutes and does not become a chore you start skipping after week three, which is exactly when motivation typically drops and when cartilage still needs the most consistent care.
Downsizing is a step people rush. The jewelry you get pierced with is intentionally longer to accommodate initial swelling, and swapping to a shorter, snugger piece too early can trap the jewelry against swollen tissue and cause pressure irritation or embedding. Wait until a piercer confirms the swelling has fully resolved before requesting a downsize, and if in doubt, have the piercer do the swap rather than attempting it yourself on a piercing that is still tender.
For the specifics on saline frequency and what to avoid, the Association of Professional Piercers publishes a free suggested aftercare guide for body piercings, and the American Academy of Dermatology’s page on caring for pierced ears covers the same ground in plain patient language.
Daily aftercare checklist
- Clean: sterile saline once or twice daily, no alcohol or peroxide.
- Dry: pat with gauze, never twist or rotate the jewelry.
- Protect: clean pillowcase, clean phone, no pools or hot tubs.
Jewelry material safety and the standards that matter
Jewelry sits inside an open wound for months, so the metal is a medical decision, not a fashion one. Only a handful of materials are proven safe for fresh piercings, and they carry precise designations from ASTM International and the International Organization for Standardization. Implant-grade titanium is the workhorse: ASTM F136, the Ti-6Al-4V ELI alloy also known as Grade 23, alongside ASTM F1295 and ISO 5832-3, plus commercially pure titanium under ASTM F67. Titanium is roughly 45 percent lighter than steel per figures from BodyCandy, and its ASTM F136 spec keeps nickel content below 0.05 percent per data cited by IMBER, which is why it suits sensitive skin.
The biggest trap is the phrase “surgical steel” or “surgical grade.” Neither is a defined standard, so the words alone guarantee nothing about biocompatibility.
Beyond titanium, a few other materials are commonly accepted for initial piercings once verified against the same standards. Niobium is chemically similar to titanium in its low reactivity and is sometimes offered as a color-anodized alternative. Solid 14-karat or higher gold can be acceptable for an initial piercing in some studios, but only if the alloy itself is nickel-free, since gold jewelry alloyed with nickel for hardness defeats the purpose. Plated jewelry of any kind, gold-plated or otherwise, should never go into a fresh piercing, because the plating can wear through during healing and expose the base metal underneath directly against open tissue.
Nickel is the reason this care matters. Nickel sensitivity affects roughly 10 to 20 percent of the population, with about 10 percent the figure most piercers cite, and reactions can derail an otherwise healthy piercing.
The European Union regulates this directly. Under REACH Annex XVII, often called the Nickel Directive, jewelry inserted into a pierced body part must not release more than 0.2 micrograms per square centimeter per week, and items in prolonged skin contact must stay under 0.5 micrograms per square centimeter per week, per rhokea citing REACH. For fresh piercings, insist on internally threaded or threadless flat-back jewelry so no screw threads drag across the wound, and verify that both the posts and the ends are certified, not just the visible gem.
The distinction between internally and externally threaded jewelry is worth understanding in detail. Externally threaded jewelry has exposed screw threads on the post itself, which then have to pass directly through the healing channel every time the piece is inserted or removed, dragging rough threading across raw tissue. Internally threaded and threadless flat-back designs keep the threading contained inside the decorative end instead, so the post that actually passes through your skin stays smooth. This single design difference is one of the most overlooked comfort and safety factors in initial jewelry, and it costs little to ask for specifically.
The Association of Professional Piercers spells out the acceptable grades in its consumer guide on choosing jewelry for initial piercings. If you also wear a septum piece, the same material logic carries over, which is why our guide to hiding and sizing a septum retainer safely leans on the identical standards.
Safe initial-jewelry materials at a glance
| Material | Standard | Note |
|---|---|---|
| Implant titanium | ASTM F136, F1295, ISO 5832-3 | Nickel below 0.05 percent |
| Commercially pure titanium | ASTM F67 | Light, low-reactivity |
| “Surgical steel” | No defined standard | Marketing phrase, verify grade |
Complication rates, red flags, and when to see a doctor
Complications are common enough to plan around, though most are minor. Up to about 35 percent of people with pierced ears experience at least one complication, per the Cleveland Clinic and a corroborating review indexed on PMC. Among those who do have a problem, minor infection accounts for about 77 percent, allergic reaction about 43 percent, keloids about 2.5 percent, and traumatic tears about 2.5 percent, though those shares describe people who already had a complication, not everyone with pierced ears. Severe events are rarer. A large cohort published by Ziegler and colleagues in The Laryngoscope in 2026 found severe complications in 2.7 percent of cartilage piercings versus 1.7 percent of lobe piercings.
Cartilage carries the higher risk across the board. In the same cohort, removal ran to 9.7 percent for cartilage versus 5.1 percent for lobe piercings, a gap that tracks the slower, lower-blood-supply healing.
The dangerous cartilage infection is perichondritis. Pseudomonas aeruginosa is the most common pathogen, treated empirically with ciprofloxacin, sometimes with incision and drainage, per the American Academy of Family Physicians and a PubMed systematic review. That review of 66 patients with auricular perichondritis reported a mean age of 18.7 years, 87.5 percent female, and scapha involvement leading to deformity in 100 percent of cases versus 43 percent for the helix. Left untreated, perichondritis can progress to cauliflower ear, so any spreading redness, warmth, swelling, or pus in cartilage warrants a doctor quickly.
Know the difference between healing and infection. Some pinkness, mild tenderness, and clear crust are normal early on. Growing pain, heat, thick discharge, fever, or a hard lump that keeps enlarging are not, and a keloid or migrating jewelry needs a professional eye.
Two conditions are frequently confused with each other but need different responses. A keloid is an overgrowth of scar tissue that forms a firm, raised bump around the piercing, typically painless once formed, and it tends to develop over weeks rather than days. An abscess or active infection instead presents with pain, heat, and often visible discharge, and it develops faster and needs prompt treatment rather than watchful waiting. Migration and rejection are a third distinct pattern, where the jewelry gradually moves closer to the surface of the skin, the tissue over it thins, and the piercing may eventually push itself out entirely, which is the body’s immune response to a foreign object it has decided to expel.
If a piercing is rejecting, removing the jewelry promptly and letting the skin heal is usually the right call rather than fighting the process, since forcing rejected jewelry to stay often leaves a visible scar. A piercer or dermatologist can help distinguish rejection from a slower but still normal healing pattern, which is another reason a follow-up check partway through healing is worth scheduling rather than skipping.
See a professional if you notice
- Spreading infection: expanding redness, heat, pus, or fever.
- Cartilage warning: deep throbbing pain suggesting perichondritis.
- Tissue change: a growing lump, or jewelry that is migrating or rejecting.
Styling a curated ear without sabotaging the heal
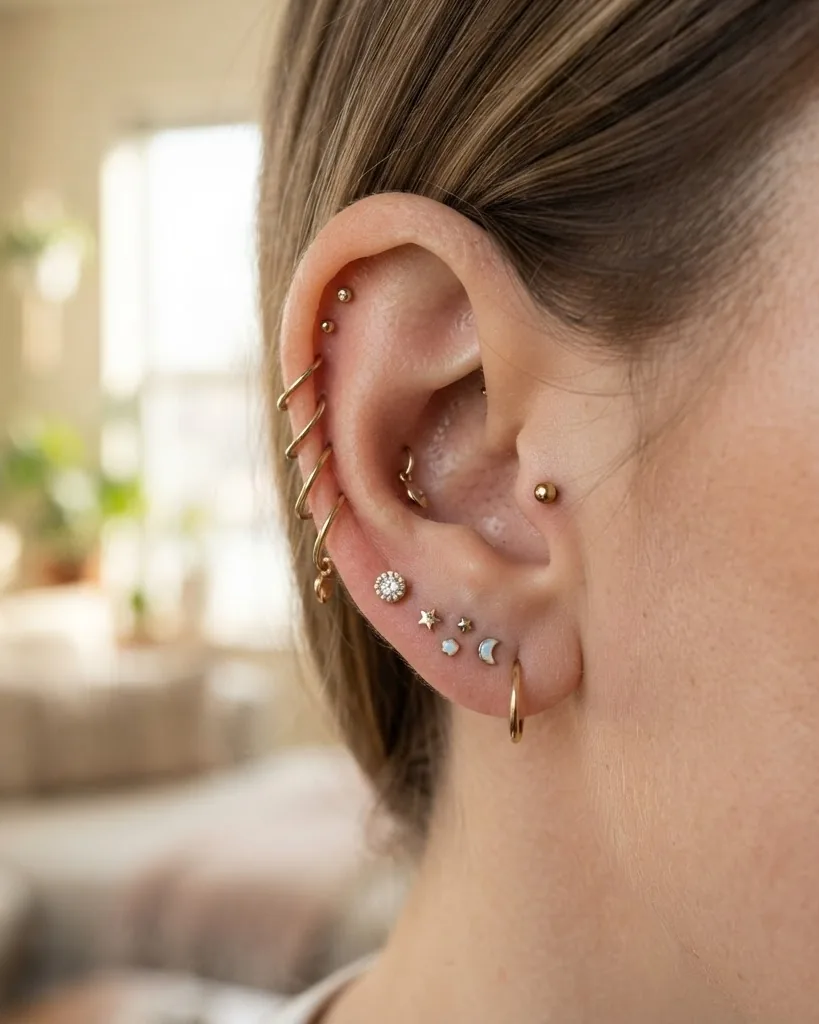
The curated ear, or ear stack, is the whole reason people chase multiple piercings, and the styling logic is simple once healing is respected. Mix statement pieces with dainty studs, play with asymmetry rather than forcing mirror-image symmetry, and let a few anchor pieces carry the composition while smaller studs fill the gaps. Cluster hoops and huggies along the helix, use flat-backs low on the lobe stack, and keep negative space so the eye has somewhere to rest. Cost varies widely by studio, city, and metal, so treat any quoted price as a moving target rather than a fixed rate.
Build the look on healed holes, not fresh ones. Swapping decorative jewelry into a piercing that only looks healed is the fastest way to reintroduce irritation.
A useful way to plan a stack is to think in visual weight rather than piercing count. Choose one or two anchor pieces, usually a hoop on the lobe or a statement stud on the helix, and let everything else read as supporting detail. Repeating the same small gold ball across three or four placements creates a cohesive rhythm along the ear without any single piece competing for attention, while a single oversized hoop paired with tiny studs elsewhere creates intentional contrast instead of visual clutter.
Metal mixing is fine once everything is stable, and titanium and gold coexist happily. Mixing finishes, such as brushed and polished metal, or mixing warm and cool tones, tends to read as deliberate rather than mismatched as long as one metal tone dominates the overall look. If you are styling a rook into the mix, sizing is the make-or-break detail, which our guide to choosing rook earring size, metal, and style walks through so the decorative piece still seats without pressure.
Common mistakes worth avoiding
A handful of mistakes account for most of the avoidable problems people run into with multiple ear piercings, and nearly all of them come down to impatience. Changing jewelry before the recommended healing window has passed is the single most common one, since a piercing that feels fine to the touch can still have an unfinished internal channel that reacts badly to a new piece being forced through it.
Cleaning too aggressively is a close second. More saline soaks than recommended, or scrubbing crust away rather than letting it soften and lift on its own, irritates tissue that would otherwise be healing quietly, and can actually slow recovery rather than speed it up.
Choosing jewelry based on appearance alone, without checking the material standard, is the mistake with the longest tail, since a nickel reaction can appear weeks or months after a piercing seemed fully settled. Finally, booking a full curated ear in one sitting because it looks appealing in a photo skips the staged approach this guide recommends, and it is the fastest way to end up managing several inflamed cartilage sites at once instead of enjoying a look that came together gradually and held.
Frequently asked questions
How many ear piercings can I get at once?
Most piercers place 2 to 3 on one ear in a single session, and many cap it near 2 to limit trauma. A common approach is one ear at a time so you can sleep on the other side. This is practitioner guidance, not a strict clinical rule, and the real limit is how much healing and aftercare you can sustain at once.
How long do multiple ear piercings take to heal?
It depends on the site. Earlobes reach initial healing in 6 to 8 weeks, with full tissue healing up to about 6 months. Cartilage takes roughly 6 to 12 months, since outer cartilage often closes in 3 to 6 months and inner cartilage in 6 to 12 months. Cartilage lags because it has a low blood supply feeding repair.
Is titanium or steel better for new piercings?
Implant-grade titanium is the safest default for fresh piercings, especially with nickel sensitivity, which affects roughly 10 to 20 percent of people. Look for ASTM F136 or ISO 5832-3 titanium, where nickel stays below 0.05 percent. Titanium is also about 45 percent lighter than steel. Avoid anything sold only as “surgical steel,” since that phrase is not a defined standard.
What are the signs my new piercing is infected?
Normal early healing shows mild pinkness, slight tenderness, and clear crust. Warning signs are spreading redness, heat, throbbing pain, thick or colored discharge, and fever. Cartilage infections such as perichondritis are urgent because Pseudomonas aeruginosa can cause lasting deformity. If symptoms spread or worsen, see a doctor promptly rather than waiting it out.
Why should I never use a piercing gun on cartilage?
A gun forces a blunt stud through tissue by pressure, which shears and crushes cartilage instead of cutting a clean channel, raising the risk of fracture and tissue death. Many guns also contain plastic parts that cannot be fully sterilized in an autoclave. A hollow needle removes a tissue core, leaving a cleaner wound that heals and seats jewelry better.
Can I sleep on my new ear piercings?
Avoid it while the piercing is healing, since pressure keeps a fresh wound inflamed and can push cartilage jewelry off-angle. Pierce one ear at a time so you can sleep on the untouched side, keep a clean pillowcase, and stop pressing a phone against the healing ear. Constant irritation is one of the main reasons piercings heal slowly or develop bumps.
How do I know if my piercing is rejecting rather than just slow to heal?
Rejection shows a specific pattern: the jewelry appears to sit closer to the surface over time, the skin covering it visibly thins, and the piercing may look like it is being pushed outward. Slow but normal healing does not show that steady outward movement. If you notice this pattern, a piercer can confirm rejection, and removing the jewelry early usually leaves a smaller mark than letting the process continue.
For a general public reference on piercing risks, the U.S. Food and Drug Administration keeps a plain-language fact sheet on tattoos and permanent makeup that also covers infection and allergy basics, and both the Mayo Clinic and the U.S. Centers for Disease Control and Prevention publish patient guidance on preventing piercing complications worth reading before you book.